


 |


Click Icon to see our Reviews

How to Install Windows 7 – a step by step guide
Before you start make certain you have your Motherboard Disc and graphics card disc or preferably a newly downloaded driver from nVidia (or AMD).
click here for nVidia Graphics Card Driver
click here for AMD Graphics Card Driver
If you are reinstalling Windows 8.1 over your existing installation, make certain you have backed up all your Data, as you may lose it all.
Put your Microsoft Windows Disc in your CD/DVD drive and start/restart your computer.

When you see the above message come on to the screen press any key. Please note that a Wireless keyboard may not work at this stage and that you may need to use a wired keyboard instead.
If you don't see this message then you may need change the boot order of your drives, please refer to the below link.....
How to boot from your CD/DVD drive.
If you see a Windows Boot Manager Screen with "Windows Setup EMS Enabled", just press Enter to continue.

Windows 7 Setup should now start as above

When the above screen appears select the correct Time & Currency Format and then click on NEXT

Click on the INSTALL NOW button to continue.

Check "I accept the license terms" and click on NEXT

Click on CUSTOM (ADVANCED) to install a new copy of Windows. If you are reinstalling Windows, make certain you have already backed up any files before you proceed.

In the above example you can see that there are 4 partitions but only two hard drives. Disk 0 is 1 hard drive but has 2 partitions while Disk 1 is also a hard drive with 2 partitions.
We are going to delete all the partitions on both hard drives in this example. If you have 2 hard drives you may wish to keep all the data on the 2nd hard drive and therefore you need only to delete the partitions on Disk 0 while keeping Disk 1 as it is.
Click on DRIVE OPTIONS (ADVANCED) as in the above screenshot to continue
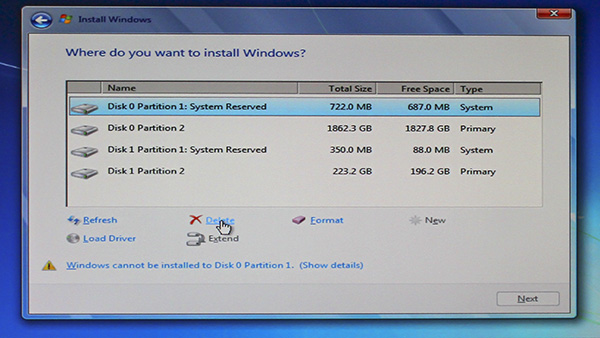
Highlight Disk 0 Partition 1: System Reserved and click on DELETE. (You will lose all your data)
Now click on Disk 0 Partition 2 and click DELETE (You will lose all your data)
Please note, most of the time the old Windows installation should be on Disk 0 but sometimes it can be on Disk 1. The way to tell is to look for the System Reserved Partition. This usually indicates that is the drive that Windows is already installed on. In the above example there is a Windows installation on both drives and we are going to delete all 4 partitions on both drives. If you have other drives you may want to keep them as they are and only delete the drive that has Windows already installed on it.

In the above example we have deleted all the partitions and we have now selected the 240Gig SSD drive (223.6Gb drive). Note how they now are Disk 0 Unallocated Space and Disk 1 Unallocated Space.
We are actually going to install Windows 7 on Disk 1 Unallocated Space instead of Drive 0. This is OK and will work fine. The drive numbering is determined by the BIOS of the motherboard and sometimes you may find that your Windows installation needs to be on Disk 1 instead of Disk 0.
Now select the Disk you wish to install Windows on and click on NEXT.

Windows will begin to install.

Windows will restart at least once, if you see the above message again, just ignore it. Pressing any key now will start the whole process off from the very beginning.

When you see the above Window, type in a User Name and click on NEXT
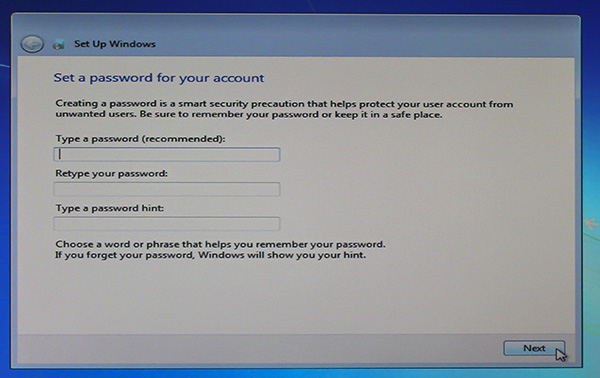
You can type in a Password at this stage, but you can also do this later. Click on NEXT

You can type in your Windows 7 Product Key at this stage and click on NEXT.
Alternatively you can also do this later when you are in Windows, you will have 30 days to do so, just Click on SKIP.
When in Windows, click on the START Button and right Click on COMPUTER and select PROPERTIES. A dialog box will open. Click on Change Product Key and Activate.

Click on USE RECOMMENDED SETTINGS to continue.

Check that your time and date settings are correct and click on NEXT.

You should now be finished installing Windows 7. You can now remove your Windows 7 disc from the CD/DVD drive.
IMPORTANT: You are not quite finished. You will need to install your MOTHERBOARD DRIVERS and your GRAPHICS/VIDEO CARD DRIVER.

In the above example we have inserted the ASRock Motherboard driver disc and clicked on the DRIVERS TAB.
You will need to install the INF Driver, HD Audio Driver, Rapid Storage Driver, ME Driver and Realtek LAN Driver (to connect to the Internet). The other files are not necessary. You do not need to restart your computer between them.
Clicking on INSTALL ALL will automatically restart the computer. Not recommended.

In the above example we have inserted the ASRock Motherboard disc for an AMD system.
You will need to install the AMD ALL in 1 Driver, HD Audio Driver, LAN Driver (to connect to the Internet), ASMedia SATA3 Driver and the ETRON USB3.0 Driver. The other files are not necessary. You do not need to restart your computer between them.
Clicking on INSTALL ALL will automatically restart the computer. Not recommended.
you can also download the latest drivers for your Motherboard
Click here for ASRock Motherboards
Click here for Gigabyte Motherboards
Click here for ASUS Motherboards
In general for Intel based motherboards you will need the INF Driver, LAN driver (for internet connection), the Intel Management Engine Driver, Intel Rapid Start Driver and Realtek Audio Driver for your particular motherboard.
Then you will need to install your Graphics/Video card driver.
click here for nVidia Graphics Card Driver
click here for AMD Graphics Card Driver

It is important that you install your Graphics/Video card driver as above
CHECKING THAT ALL DRIVERS HAVE BEEN INSTALLED....
Click on the START Button and select CONTROL PANEL

Click on the drop down menu on VIEW BY and select LARGE ICONS and then click on DEVICE MANAGER.


As you can see in the above example we are missing a driver for the Universal Serial Bus and the Marvell driver. You can right click on it and select Update Driver Software which will search for the driver online.